April 16, 2010

Signs of Spring - Marinated Baby Artichokes

Out of China - and back to blogging!   

Another spring dish, baby artichokes gently cooked and marinated are a fabulous way to usher in the season.  These artichokes can be served as part of a Mediterranean spread of appetisers, as a delicious side to roasted or grilled meats, or simply enjoyed on their own, eaten delicately one by one.

Angelo’s Artichokes
from Olive Oil: From Tree to Table, by Peggy Knickerbocker*

24 baby artichokes
2 lemons 
4 cups water, divided
2 c. red wine vinegar
20 mint leaves, julienned
4 cloves garlic, minced
1/3 to ½ cup olive oil

1.  Squeeze the lemons and pour the juice into a medium bowl.  Put the lemon halves into the water also. 

2.  Trim the outer leaves of the artichokes until you get to the tender green leaves.  Trim the stem off and the top ½ inch of the tops.  Cut the artichokes in half lengthwise and as you do, put them into the lemon water. 


3.  Bring the remaining 2 cups water and the red wine vinegar to a boil in a medium saucepan.  Drain the artichokes, discarding the lemon halves, and add to the boiling water.

4.  Boil gently for 10 to 15 minutes, or until the artichokes are tender.  Drain and leave in a colander for 30 minutes or so, to ensure all the liquid is drained.


5.  Meanwhile, combine the mint, garlic and olive in a decorative ceramic bowl.  When the artichokes have drained, add them to the mixture and combine until they are thoroughly coated.

6.  The artichokes are ready to serve but will be even better if you let them marinate for several hours.  They can be left at room temperature, or stored in the fridge overnight.  Cover and let come to room temperature before serving (you can serve them cold but the flavour really sings when they are room temperature).

7.  If you can resist eating them all, the artichokes can be stored for several weeks in the fridge.  Put in a container with a tight fitting lid, cover with olive oil until the artichokes are submerged, and serve as needed. These make a great hostess gift, as you can bring them in a beautiful little bowl that becomes part of the gift.

* I love the little circles life makes.  One of the things that really got me going on this blog was a deep desire to celebrate food, and the experience of making it – getting beyond the pedestrian to touch something of the sublime that sharing food brings. And through that process, to discover both the new and known in different ways.

When I was a kid, I was the only one who didn’t eat artichokes.  My mother would make simmer large globe artichokes for what seemed like hours over the stove, cooked with homemade chicken broth and lots of freshly grated Parmigiano Reggiano.  I can smell them now, but sadly can no longer taste them, and that recipe, along with many others, is lost.

Fast forward to the here and now.  Olive Oil: From Tree to Table was a gift from a work colleague, and I immediately loved the story-telling behind both olive oil production and the recipes themselves.  It was one of those books that seemed like a good one to cook my way through, and Angelo’s Artichokes was the second recipe.  I never really thought about who Angelo might be, beyond the brief and charming story Peggy Knickerbocker tells of sharing a meal with Angelo and several chefs and seeing him take a case of fresh baby artichokes and make this dish.

As I made these artichokes recently to bring to friends for dinner, I idly read the description of Angelo again.  Peggy describes him as a forager and an ironsmith.  And it clicked.  Angelo was none other than Angelo Garro, who Michael Pollan goes hunting with in The Omnivore’s Dilemma, a book that has made me passionate about knowing my food and understanding where it comes from.  The chapter that describes their outing – which includes in a gourmet picnic eaten in the middle of the woods – is a highlight.  To imagine that I am ever so slightly closer to someone as passionate about food as Angelo, through the mechanism of a printed recipe on a page, is a wondrous thing.  That my Italian mamma is smiling approvingly down at me somewhere in the great beyond is a much closer connection that I celebrate with every garlicky bite.

April 12, 2010

AWOL in Beijing

As my plane touched down in Beijing today, it suddenly occurred to me that I might not have access to my blog via my computer. Yup. So I'm learning how to blog via my Blackberry and slowly seeing the attraction of an iPhone... Depending on how it goes, you may see my post on fabulous marinated artichokes later today or in a week when I get to Singapore.

April 10, 2010

Apple of My Eye Pie Redux

Way back in November, I made what looked like a pretty darn good apple pie.  Hibernating in the corner of my freezer, Easter Sunday seemed as good a time as any to figure out how to bake a frozen pie in double-quick time in my TurboChef.


An easy 23 minutes later, the pie emerged from the oven, perfectly browned and utterly delectable.  It's the ultimate combination - a slow day of cooking and a super speedy way to eat the results.  Yum!


If you try the recipe, note that I have modified it with the addition of lemon juice and cardamom.  The lemon juice adds quite a pronounced lemony flavour, which I love, but if you want something more subtle, try adding just a tablespoon. Also be sure to let the pie cool sufficiently so the juices "set". If you're baking in a regular oven, pop the pie in a preheated oven at 350°F for 30 minutes.  After 30 minutes, check the pie and if the crust is browning too quickly, cover the top with foil (or even just the edges if that's what's really browning). Continue baking for another 30-40 minutes, or until the slits on top are bubbling.

My friend Jenny tells me about baharat, which sounds amazing. See her explanation below.  Next time I'll try some of that to give this pie a spicy note.

For seasoning, in addition to a bit of lemon juice and sugar, I'm using baharat. Mine is from the Spice House in Chicago - the top note of this popular table seasoning from the Middle East (I'm all about ME cuisines this year) is very cinnamon/nutmeg, but the secondary note upon first taste is more complex, leaving one with a little kick that fits in with today's vogue for spicy desserts. Ingredients are: Tellicherry black pepper, coriander, cumin, Ceylon select cloves, Saigon cinnamon, cardamom, Spanish paprika and Chinese Tien Tsin chile peppers. Sounds weird, but really works.

April 06, 2010

Six Hour No Knead Artisanal Bread

There's been lots written about Jim Lahey's 18 hour no knead bread: the crackling brown crust; the airy, chewy delectable interior; the artisanal look; and most of all, the no fuss, no muss no-knead method.  But, as much as I love bread, it just seemed hard to be able to plan for something that far in the future, even if it meant no work on my part.

That's why this six hour version from Bonnie Stern is exactly right for me.  I can stir up the dough right after lunch, tend it one more time and be at the table with hot bread by supper.  What could be better than that?

Six Hour No-Knead Bread
adapted by Bonnie Stern from Jim Lahey's recipe

makes one gorgeous loaf

3½ cups all purpose flour (or a combination of all purpose and whole wheat)

nb. I've long been intrigued by King Arthur Flour - simply because it's not available in Canada and it gets such great raves.  Finally got my hands on some and I have to say the results were fab...

1 tsp instant yeast
1 tbsp kosher salt
1½ c warm water
¼ tsp red wine vinegar
Additional flour
Cornmeal, sesame seeds or bran (optional)

1. Mix the flour, yeast and salt together in a large bowl. 

2.  Combine the water and vinegar and stir into the flour mixture until combined: you will have a soft, sticky dough. Cover the bowl with plastic wrap and a tea towel and leave at room temperature for three to four hours.


3.  Prep a baking sheet by covering it with a tea towel, sprinkled generously with flour.  Take the dough (which should be risen and full of bubbles) and spread it in a rectangular shape on the sheet that is approximately 12 x 8".  Cover loosely with plastic wrap, and let rest for 15 minutes.


4.  Place another clean tea towel on a baking sheet on which you have rubbed flour  and sprinkled cornmeal (or bran, etc.). Remove plastic wrap and fold dough into thirds, brushing off flour as you go.  Fold into thirds again to create a pudgy cube: this will become your beautiful boule. Place on the baking sheet and dust the top very lightly with more flour and cornmeal.  Fold the tea towel on top and let rise at room temperature, at least two hours (more is okay).


5.  Forty-five minutes before baking the bread, preheat the oven to 450°F.  Place a heavy large pot with a lid in the oven (for example a Le Creuset Dutch oven) and heat it for 30 minutes.

6.  Take the pot out of the stove and remove the lid.  Placing your hand underneath the dough, lift the boule gently and uncover, shaking off any excess flour and cornmeal over the baking sheet.  Flip the bread into the hot pot, cover and bake for 30 minutes.

7.  After 30 minutes, remove the lid, and bake a further 10-20 minutes, or until the bread is deep golden brown and crusty.* Let cool on a rack.


*When I took off the lid, the bread already looked quite brown to me, but it still needed that extra baking time.  I found that 10 minutes did the trick.

April 01, 2010

Pecan-Cherry Loaf

With a quart of buttermilk in the fridge from my most recent homemade butter outing, I wanted to do some baking.  A simple sweet bread, bursting with dried cherries and nuts, seemed a good candidate.  Pop a loaf in the freezer for your next Sunday brunch; it's great toasted too.

Pecan-Cherry Loaf
makes two-three loaves

3½ c flour
2 tsp baking soda
1 tsp kosher salt
½ tsp cinammon
2 eggs
1½ c brown sugar
1 c buttermilk*
1 c chopped pecans or walnuts
1 c dried cherries

*I used fresh buttermilk, which is actually quite thin (consistency similar to skim, or non-fat milk).  If you are using regular buttermilk you may need to adjust the quantity, using more to get a thick batter consistency.

1.  Preheat oven to 325°F.  Grease two 4x8 loaf pans or one 5x9 pan (you may have too much batter - so have a mini loaf pan on hand just in case: breakfast for one!)

2.  In a medium bowl, sift together flour, baking soda, salt and cinammon; set aside.

3.  In a large bowl, beat eggs. Add sugar and beat until combined.

I love the deep gorgeous yellow of the duck eggs!


4.  Alternating with buttermilk, add flour to egg mixture and stir until just combined.  Stir in nuts and cherries.


5.  Bake about 45-50 minutes, or until toothpick inserted in bread comes out clean. 


6.  Set on a rack to cool; but not too cool - let a pat of butter melt on top of that first slice.


March 30, 2010

The Morel of the Story - Morel Mushroom and Goat Cheese Scramble

Spring is here.  The evidence is all around me - tiny tiny buds on the lilac trees; day lily leaves shooting out of the ground; the smell of new rain and fresh earth in the air. Best of all - cherry blossom branches and fresh morel mushrooms at Fiesta Farms.

I think I'll combine the morels with the duck eggs I bought from Stoddard's at the farmers' market, add a slice or two of Ruth Klahsen's runny Monforte goat cheese and make a scrambled up dinner just for one. 

Morel Mushroom and Goat Cheese Scramble
serves one

1 fresh duck egg, plus two extra egg whites
⅓ lb. fresh morel mushrooms, lightly rinsed and brushed to remove any dirt
1 tbsp bacon fat*, duck fat or any cooking oil of your choice
1-2 oz goat or other mild soft cheese
Salt and pepper to taste

1.  Combine duck egg and egg whites with salt and pepper to taste in a small bowl and whisk lightly until frothy.  Set aside.

2.  In a non stick skillet, melt about 1 tbsp bacon fat and heat over medium heat.  Add the morels and saute gentle until they are softened and ever so slightly browned at the edges.

 3.  Pour the eggs over the morels and cook over gentle heat until the eggs begin to set.  While they are cooking, crumble the goat cheese on top and continue cooking until the eggs are just set and the cheese melted.


4.  Pour a bright crisp glass of Chardonnay or a dry Riesling and enjoy.


*Now, I know that bacon fat is not good for you. Or so I thought until I googled the term "is bacon fat bad for you?"  Turns out that many are greasing up their pans (and recipes) with bacon fat that's been stored in the fridge. 


Saving the bacon fat was somewhat accidental.  I had made rosemary bacon for a brunch recently (wrap bacon around rosemary spears; cook in 350°F oven for 20  minutes or until crispy), and set aside the baking sheet.  After the guests departed and clean up begun, I noticed the rosemary-infused bacon fat had hardened. Why not save it?  My mother certainly would have.  Turns out just a dab is enough to cook with, for a very occasional dose of super-charged flavour.  I'll let you decide whether it's a good thing or not....

March 23, 2010

Sweet Treat - Coffee-Pecan Torte

Sweet tooth? C'est pas moi. Given a choice between chocolate and cheese, I'll choose cheese every time. And yet...and yet... There is something about a really good, intense sweet treat. Something like this Coffee Pecan Torte, photocopied from a magazine years ago. I've changed the shortening-laden glaze to a rich ganache, and kept the gooey chocolate graham crust and rich mocha layer. No bake, make-ahead and freezable, this is the ultimate easy and delectable dessert that impresses every time.

Coffee Pecan Torte
serves 14 to 16 (Really! Don't be tempted to cut the pieces too big - this cake is rich)

1 c. pecan pieces
1 9" springform pan

Mocha Layer
½ c. butter
½ c. granulated sugar
½ c. sifted cocoa powder
1 tsp instant espresso dissolved in 1 tsp hot water
1 egg
2 c. graham wafer crumbs

Coffee Pecan Layer
½ c. softened butter
2½ c. sifted icing sugar
2 tbsp instant espresso dissolved in 2 tbsp hot water
1 tsp vanilla
Pinch salt
Chocolate Ganache Glaze
10 oz bittersweet chocolate
8 oz heavy cream, preferably organic

1. Preheat oven to 350°F. Arrange pecans on baking sheet and bake for 10 to 15 minutes, or until golden and fragrant. Cool slightly, chop finely, divide into two ½ cup portions, and set aside.        
2. Prepare pan. (I hate trying to line a springform pan.  The easiest way I know is to open the band, cut a piece of parchment paper slightly bigger than the bottom, place the band back on top and close it.  The paper is usually very taut and easy to trim). Open spring and release bottom of pan.  Grease sides of pan "band" with butter.  Cut a piece of waxed or parchment paper that is slightly bigger than the bottom of the springform pan.  Place the paper on the bottom of the pan, place the band on top and close the latch.  Trim excess paper with scissors.

                                                                                                                                              
Mocha Layer                                                                                  
1. In a double boiler, melt butter; stir in sugar, cocoa powder, instant espresso/water mixture and egg.  Cook, whisking constantly, about 1 minute or until mixture is thickened and smooth.

2. Stir in graham wafer crumbs and ½ c. of the chopped pecans. Pack mixture into prepared cake pan. Place in freezer to cool.

Coffee Pecan Layer

1.  In a medium bowl, using an electric mixer, beat butter until fluffy.  Gradually beat in icing sugar, instant espresso, vanilla, salt and remaining chopped pecans. 

2.  Continue beating until mixture is fluffy and a deep caramel colour.


3.  Spread evenly over cooled mocha layer.  Cover torte tightly and return to freezer for at least one hour.  Cake can be prepared ahead to this point.  Wrap well, and store in freezer for up to one month.

Chocolate Ganache Glaze

1. Break the chocolate into small pieces and grind in a food processor until fine.  Set aside in a small heavy bowl.

2.  Heat the cream until it is just about boiling; be careful not to scorch it.  Pour about three quarters over the chocolate and cover.  After 5 minutes, stir gently until smooth. Once the ganache has cooled slightly, check for consistency. If it's too thick to pour in a gentle stream, add additional cream a bit at a time until the right consistency is reached. 

To assemble:

1.  Remove torte from pan, but leave the cake on the base of the pan.  Line a cookie sheet with waxed or parchment paper.  Place the cake on a raised surface (eg an overturned tray or bowl) to elevate it; place on the tray. 


2.  Pour chocolate ganache evenly over torte, spreading smoothly over top and sides (or not so evenly in my case!).  While ganache is still soft, decorate cake; I used pecan halves.


3.  Once ganache has hardened, cover torte loosely with plastic wrap and refrigerate.  Torte can be stored in the freezer for up to one month.  If storing, double wrap tightly.    

4.  For easy slicing and best flavour, let the cake stand at room temperature for one hour before serving.  Use a knife dipped in hot water to cut cake. 


March 19, 2010

Just Ducky - Duck Breast Confit with Pomegranate-Studded Greens


 con∙fit (\kƍn-ˈfē), n.
French, from Old French, preparation, preserves, from past participle of confire, to prepare

1.  meat (as goose or duck), cooked and preserved in its own fat
2. a garnish made usually from fruit or vegetables, are cooked until tender in a seasoned liquid

It should be no surprise that I love duck.  My blog is named for Julia Child's favourite birthday dinner (and one that sounds just about perfect to me); the first meal we cooked in our ĂŒber TurboChef was a roast duck; and a perennial feature at our annual Open House are mini duck confit potpies adapted from Food and Wine magazine.

So making duck confit itself seemed a natural next step.  I decided to use duck breasts, and give them a slightly Indian flare, inspired by a recent dish at Dish.  Slicing the duck breasts, still glistening with traces of that glorious fat, and strewing them over pomegranate-studded greens, made a supremely scrumptious dinner.

Duck Confit Breasts
adapted from Dish Cooking Studio

2 tbsp brown sugar
½ tsp ground cumin
2 tsp Bengali garam masala*
2 bay leaves, crushed
Kosher salt
4 cloves garlic, minced
2 duck breasts, approx 1 lb. each
2 lb rendered duck fat (you can make your own or purchase it from your local butcher)
5-6 whole cloves garlic, peeled

*Bengali garam masala:
To make Bengali garam masala, grind together one 3" cinnamon stick, broken in three pieces, 15 cardamom pods and 8 whole cloves as finely as possible. Store in a spice jar and use sparingly in stews and braises for a subtle spicy kick.

1.   Combine first four ingredients together in a small bowl, and sprinkle evenly over each breast.

2.  For each lb. of meat, measure ⅓ of an oz. of kosher salt, and sprinkle it evenly over all sides of the breast. 

3.  Set the breasts in a glass baking dish and sprinkle with the minced garlic.  Cover tightly with plastic wrap and cure them in the refrigerator for a minimum of 24 hours.

4.  When you are ready to roast the breasts, preheat the oven to 250°F.  Drain any liquid that has accumulated in the dish, and wipe dry. Scrape the spices off the meat and set the breasts back in the baking dish.

5. Heat the rendered duck fat gently until it is clear and amber.  Pour the fat slowly over the duck breasts until they are completely covered. 

6.  Place garlic cloves in oil.  Roast duck, uncovered, for about one hour, or until the meat is medium rare.  Let cool in the fat.

7.  Place duck in a glass jar or container that has an air tight lid.  Strain the fat through a cheesecloth, and pour over the duck.  Let cool, then cover and refrigerate.  The duck will keep for up to six months - if you can wait that long to eat it!


Duck Breast Confit with Pomegranate-Studded Greens
serves six

¼ c. minced shallots
1 tbsp grainy mustard
2 tbsp pomegranate molasses
2 tbsp Champagne vinegar
2 tbsp brown sugar
½ c. olive oil
The seeds of one pomegranate
Salt and pepper to taste
4 c. mixed greens of your preference; wild greens, such as dandelion, are a nice counterpoint to the duck

 
1. Combine all vinaigrette ingredients and whisk together in a small bowl. Taste and adjust for seasonings.


2. Arrange greens on individual plates, or one large platter if serving family style.  
 
3.  Remove fat from duck breasts and slice on the diagonal, arranging attractively on the greens.  Sprinkle with pomegranate seeds.  Spoon dressing to taste on top, and serve.


March 13, 2010

Fire up the Grill - Asian Grilled Chicken-Seafood Brochettes

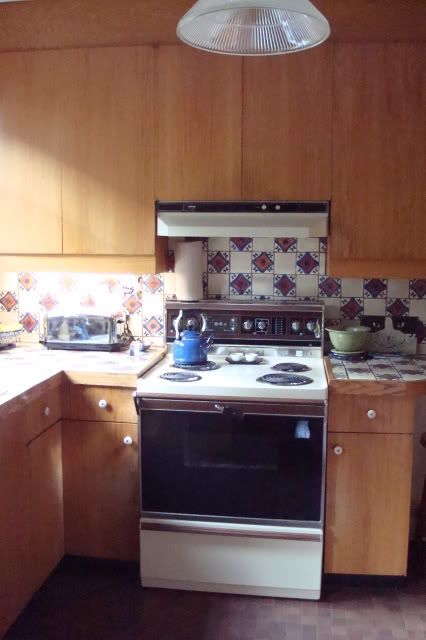
For 12 years before our kitchen reno, I cooked on a semi-ancient Hotpoint.  The clock was frozen at 8:54, the timer didn't work and I was never really quite sure what the oven temperature was.  Worst of all, the electric coils were uneven, sometimes too hot, never really able to get down to a simmer.  Which made our upgrade to a BlueStar cooktop a dream.  Flanked by four gorgeously fiery elements, the cooktop's centrepiece is a charbroiler with 15,000 BTUs of cooking power. 
While I've used the broiler to grill bread and veggies, I hadn't really put it to the test until last weekend.  What to bring to a potluck Oscar party - something easy to eat while watching the red carpet?  Grilled brochettes seemed a good solution, and good way to really put the charbroiler to the test.  Could it produce juicy chicken and grilled shrimp with just the right degree of smoky flavour? 

I knew immediately what marinade I would use - Anna's House Salad Dressing from Bonnie Stern's Friday Night Dinners cookbook.  We have used this amazingly versatile dressing as a marinade for everything from halibut and salmon to using it as a finishing touch on roasted veggies.  Next time you are firing up the grill, make a double batch of this, marinate your meat or seafood of choice and use the rest to dress crisp romaine leaves.  Yum!

Asian Grilled Chicken-Seafood Brochettes
serves four hungry people

6 boneless skinless chicken thighs
12 medium raw shrimp, shelled and deveined (leave tails on)
12 sea scallops
2 red peppers, cut into chunks
Pint whole cherry tomatoes


3 tbsp seasoned rice vinegar
1 clove garlic, minced
½  tsp kosher salt
1 tbsp honey
1 tbsp soy sauce
½ tsp roasted sesame oil
⅓ c. vegetable oil
bamboo skewers

1.  Mix marinade ingredients together, whisking in the vegetable oil last.  Toss the chicken and seafood in the marinade until well coated, and refrigerate for 30 minutes (and up to two hours if you have the time).  In a seaparate bowl, toss peppers and tomatoes with marinade and leave out at room temperature.

2.  When ready to grill, drain the chicken, seafood and veggies to prevent flare-ups. 

3.  Grill chicken for 6-8 minutes per side, or until no longer pink.  Grill shrimp until opaque and pink. Grill scallops until just white and opaque (watch shrimp and scallops closely as they will cook quickly).  Set aside.


4.  Grill veggies until just tender and slightly charred.

5.  Thread chicken and seafood on bamboo skewers, alternating with veggies if desired. 

6.  Enjoy!

March 05, 2010

Dishing It Out - Chocolate-Espresso Pots de Creme

There's a wonderful little cooking studio in my neighbour.  Called Dish, it's tucked away off the street, incongruously sharing a space with a dry cleaning shop.

Recently, a group of women gathered at Dish to cook, drink wine, meet new friends and, well, dish. The set-up was perfect: several cooking stations; teams of two, three or four working together; easy to prepare and delicious recipes and best of all, a chance to eat everything we made.

I was on Chocolate-Espresso Pots de Creme duty.  The ingredients are few, the process ridiculously easy and the results - divine.

Chocolate-Espresso Pots de Creme
serves six
courtesy of Dish Cooking Studio

1⅓ c. heavy cream
⅔ c. whole milk
1½ tsp. instant espresso powder
Salt
6 oz. bittersweet chocolate, finely chopped
6 large egg yolks
2 tbsp. sugar
6 8-oz ramekins

1.  Pour yourself a generous glass of wine.  Sip.

2.  Put oven rack in middle position and preheat oven to 300F°.

3.  Put chocolate in a heatproof bowl.  Combine cream, milk, espresso powder and a pinch of salt in a small heavy saucepan and bring to barely a boil, stirring to dissolve espresso powder. 

4.  Add chocolate, and whisk until the chocolate is melted and the mixture is smooth. Keep warm.

5.  In another bowl, whisk together yolks, sugar and a pinch of salt.  Add the warm chocolate mixture in a stream sloooowly, whisking constantly.*


 6.  Pour chocolate custard through a fine mesh sieve into a one-litre glass measure.

7.  Line the bottom of a baking pan, large enough to hold the ramekins, with a folded kitchen towel and arrange ramekins in the pan.  Divide custard amongst the ramekins, and cover tightly with a large piece of foil into which several holes have been poked.


8.  Place the pan with the custards in a bain marie* and bake until custards are set around the edges but still slightly wobbly in the middle, about 30-35 minutes.

9.  Uncover ramekins and transfer to a rack to cool completely, about one hour.  Custards will set as they cool.  Chill, covered, until cold.  Can be made one day ahead.

Notes
- If you add the warm chocolate to the cool cream mixture too quickly, the cream and eggs will "cook" and instead of a smooth creamy custard, you'll have scrambled eggs.  Add the warm liquid very slowly.  When the bottom of the bowl is warm to the touch, the temperature has stabilized and you can add the remaining chocolate custard all at once.

- A bain marie is also known as a water bath, and is a method of heating and cooking delicate foods gently to prevent burning or scorching.