November 25, 2010

Salad Days: Butter Crunch Salad

I know I know – it’s getting cold outside and we’re supposed to be turning to hearty soups and stews in the kitchen. And I love root vegetables – really I do – so the abundance of all those gnarly misshapen potatoes, turnips, parsnips and yams makes me want to whip out the roasting pan and turn up the oven.

But all that hunkering down needs to be balanced, and there’s no better way than with a salad that’s filled with all things green. Really bright and dazzling, with a lemony dressing that highlights every leaf and shimmers. When I want to feel light-filled, and well, light, after too much hibernation food, this salad is what I crave.

Butter Crunch Salad
serves six

For salad:
1 head butter (Boston) lettuce, washed and torn into bite sized pieces
1 fennel bulb, trimmed, cored and sliced
2-3 celery stalks, leaves included, diced
1 Granny Smith apple
1 cup sunflower sprouts
1 ripe avocado (optional)*


For dressing:
2 tbsp Champagne vinegar
2 tbsp Meyer lemon juice, divided
Grated lemon zest from two Meyer lemons (use regular lemons if Meyer isn't available)
1 tbsp honey
1 tbsp grainy mustard
½ tsp salt
Lots of freshly ground black pepper
¼ cup olive oil

*Part of the beauty of this salad is its "super crunch".  To maintain that consistency, skip the avocado.
1. Make dressing first. Whisk to combine vinegar, 1 tbsp lemon juice, lemon zest, honey, mustard, salt and pepper. Slowly add oil until combined. Set aside.


2. In a large bowl combine lettuce, fennel and celery. Halve, core and dice apple and place in a small bowl; toss with remaining lemon juice. Peel and dice avocado and gently toss with apple and juice. Place in bowl with lettuce. Roughly chop the sunflower sprouts and add to the lettuce.

Be sure to include the celery leaves

Tart Granny Smith apples add both crunch and zestiness to the salad

Hydroponic sunflower sprouts - you can't get any fresher

3. Whisk the dressing one last time, pour over the salad, toss gently and enjoy. Your stomach will be happy and you can spring for dessert - or a second helping of roasted potatoes - guilt-free.

November 20, 2010

Fruitful Baking: Delicious Tarte Tatin

I’ve never been much of a baker. It’s the exacting science of it that puts me off. Measuring precisely. Step by step sequences of events that can’t be altered. Cold equipment and room temperature eggs (or is it room temperature equipment and cold eggs?). You see what I mean. I haven’t started yet and already I’m sure I’m going to miss a beat. When it comes to the kitchen, I’m more jazz than classical – more improvisation, less following the score note by note. Give me syncopation over exact execution every time.

But I do love pie. And I do love Julia Child. So when we decided to make a dinner in honour of Julia Child’s birthday last year (inspired by a menu in Bon Appetit magazine), I thought we’d substitute the proposed dessert, Reine de Saba, for something I’d never tried before: the ultimate French dessert, tarte tatin. E voila – a new recipe entered my speed dial repertoire and a baker was born.

Since then I’ve made this tarte tatin many times, and every time it’s delighted me with just how easy baking can be. With fall apples filling the farmers’ market tables and in cold storage, it’s a perfect time to try this one yourself. C’est ci bon!

Julia’s Tarte Tatin
from Julia's Kitchen Wisdom
serves six

Here’s my version of Julia’s pie dough, which can be used for the tarte or for any sweet or savoury pie you wish to make. You will need about half of this recipe for the tarte. If you have a favourite pie dough recipe, by all means use it.  The great thing about dough is that it can be frozen so you can have some at the ready whenever you're in the mood for a sweet treat.  Also be sure to allow enough time for the dough to rest; while some recipes will call for a mere 30 minutes, I like to let the dough rest, as Julia suggests, for a couple of hours.

For the Tarte Tatin:

6-8 Jonagold apples, cored, peeled and halved (any good baking apples will work well here)
The juice and zest of 1 lemon
1½ cups sugar
6 tablespoons unsalted butter
Heavy oveproof 9-inch skillet for cooking and baking
Optional: whipped cream or vanilla ice cream, as accompaniment

1. Preheat the oven to 425°F, with the rack in the lower middle position.

2. Slice the halved apples into 4 lengthwise wedges each, and toss in a large bowl with the lemon juice and zest and ½ cup of the sugar. Drain the apples after macerating 20 minutes.


3. In the skillet, melt the butter over medium-high heat. Stir in the remaining 1 cup sugar and cook until the syrup bubbles and turns golden brown. Remove the pan from the heat and arrange a layer of apple slices in a circular pattern on the caramel in the skillet, then arrange the remaining apples neatly on top.

Everything's better with butter!


4. Return the pan to moderately high heat and cook for about 25 minutes, covering the pan after 10 minutes. Every few minutes press down on the apples and baste them with the juices. When the juices are thick and syrupy, remove the pan from the heat.  Watch and smell at this step - because of the high amount of sugar, your syrup can go from thick and buttery to burnt in seconds.

5. On a lightly floured surface, roll the chilled dough into a circle, ⅛-inch thick and 1-inch larger than the top of the pan. Drape the dough over the apples, pressing the edge of the dough between the apples and the inside of the pan. Cut 4 small steam holes on the top of the dough. Bake until the pastry has browned and crisped, about 20 minutes.


6. Let the tarte rest for 10 minutes. Here’s the tricky part! Unmold the tart onto a serving dish (so the pastry is on the bottom). I haven’t quite mastered this to be honest. Rich bought me an Emile Henri tarte tatin baking dish that I’ve tried out once, with only slightly better success. This is a case where practice makes perfect, and I am very happy to keep practicing!  Serve warm or cold with whipped cream or vanilla ice cream, as desired.

A bit messy but no one will mind

Bon appétit!

October 31, 2010

Preserving Flavour in a Jar: Fig Lemon Thyme Confiture

Well, shoot.  It was only after I posted my adventures in canning - namely making plum jam and Italian tomato sauce - that I read the deets on September's Daring Cooks' Challenge.  Yep.  We were asked to learn about food preservation and can or freeze something.  I felt sufficiently proficient to tackle something other than the apple butter or bruschetta in a jar that was suggested...and after reading this recipe on Mrs. Wheelbarrow's Kitchen, this was a must do.  And even though September is feeling very far away, I wanted to post the results.

The September 2010 Daring Cooks’ challenge was hosted by John of Eat4Fun. John chose to challenge The Daring Cooks to learn about food preservation, and challenged everyone to make a recipe and preserve it by either canning or freezing it. John’s source for food preservation information was from The National Center for Home Food Preservation.

Fig Lemon Thyme Confiture
from Mrs. Wheelbarrow's Kitchen
updated September 2013
 
4 lbs. fresh figs
1 lemon
½ c honey
Scant 3 c sugar
3 to 4 sprigs of thyme, tied together in a small piece of cheesecloth (optional)*

1.  Pour boiling water over the figs, allow to stand for 10 minutes and then drain. Quarter the figs, then place them in a large non-reactive pan.  I love my sturdy and pretty #26 Le Creuset pot.


2.  Wash the lemon well and slice very thin with a mandoline or a sharp knife, and then cut into quarter slices.*  Remove the seeds. Add the lemons, honey, sugar and thyme to the figs.


3.  Bring the mixture to a simmer, stirring to dissolve the sugar. Take off of the heat, cool slightly, cover and refrigerate at least 8 hours or overnight to develop the flavors.


4.  When you're ready to can, remove the thyme and bring the jam to a full rolling boil, and boil vigorously for five minutes, stirring constantly to avoid burning the jam.  For a thicker jam, add one packet of liquid pectin before bringing to a boil.

5.  Pour hot jam into hot sterilized jars and process for 10 minutes in a boiling water bath.


This gorgeous jam is the perfect accompaniment for a lovely cheese course, an unusual condiment for a grilled cheese sandwich, roast chicken or just spread over a piece of thick and crusty baguette, made all the more decadent with a slather of butter.


*The first time I made this I left the lemon slices whole, and did not use the pectin.  I found the resulting jam too "chunky" for my liking, but also not "jammy" enough.  Also be careful with how much thyme you use.  The flavour can be overwhelming for the delicate figs.

October 26, 2010

Comfort Food: Eliz's Roast Chicken


Sure there’s fancy. I have stacks of old Gourmet magazines in the basement, filled with recipes two pages long, multi-day complex affairs that somehow never quite live up to all their promise. It used to be that I’d seek out the especially long ones, seeing a virtue in surviving a marathon of cooking, struggling to get everything to the table at once and hot.

And while those moments of total immersion in a new recipe, technique or process still beckon (tomato sauce anyone?), there’s something deeply satisfying about simple. A chicken. A lemon. Some fresh herbs. Garlic. Olive oil.


Roast chicken really is a most magical dish.

Eliz’s Roast Chicken
serves two greedy people, or four moderately hungry ones.

Perfect every time, this is my go-to meal for after work, Friday night dinner with friends, or a lazy Sunday lunch. Add a salad, good crusty bread and a bottle of wine or whatever else appeals to your rumbling stomach.

1 4½ - 5 lb organic whole roasting chicken
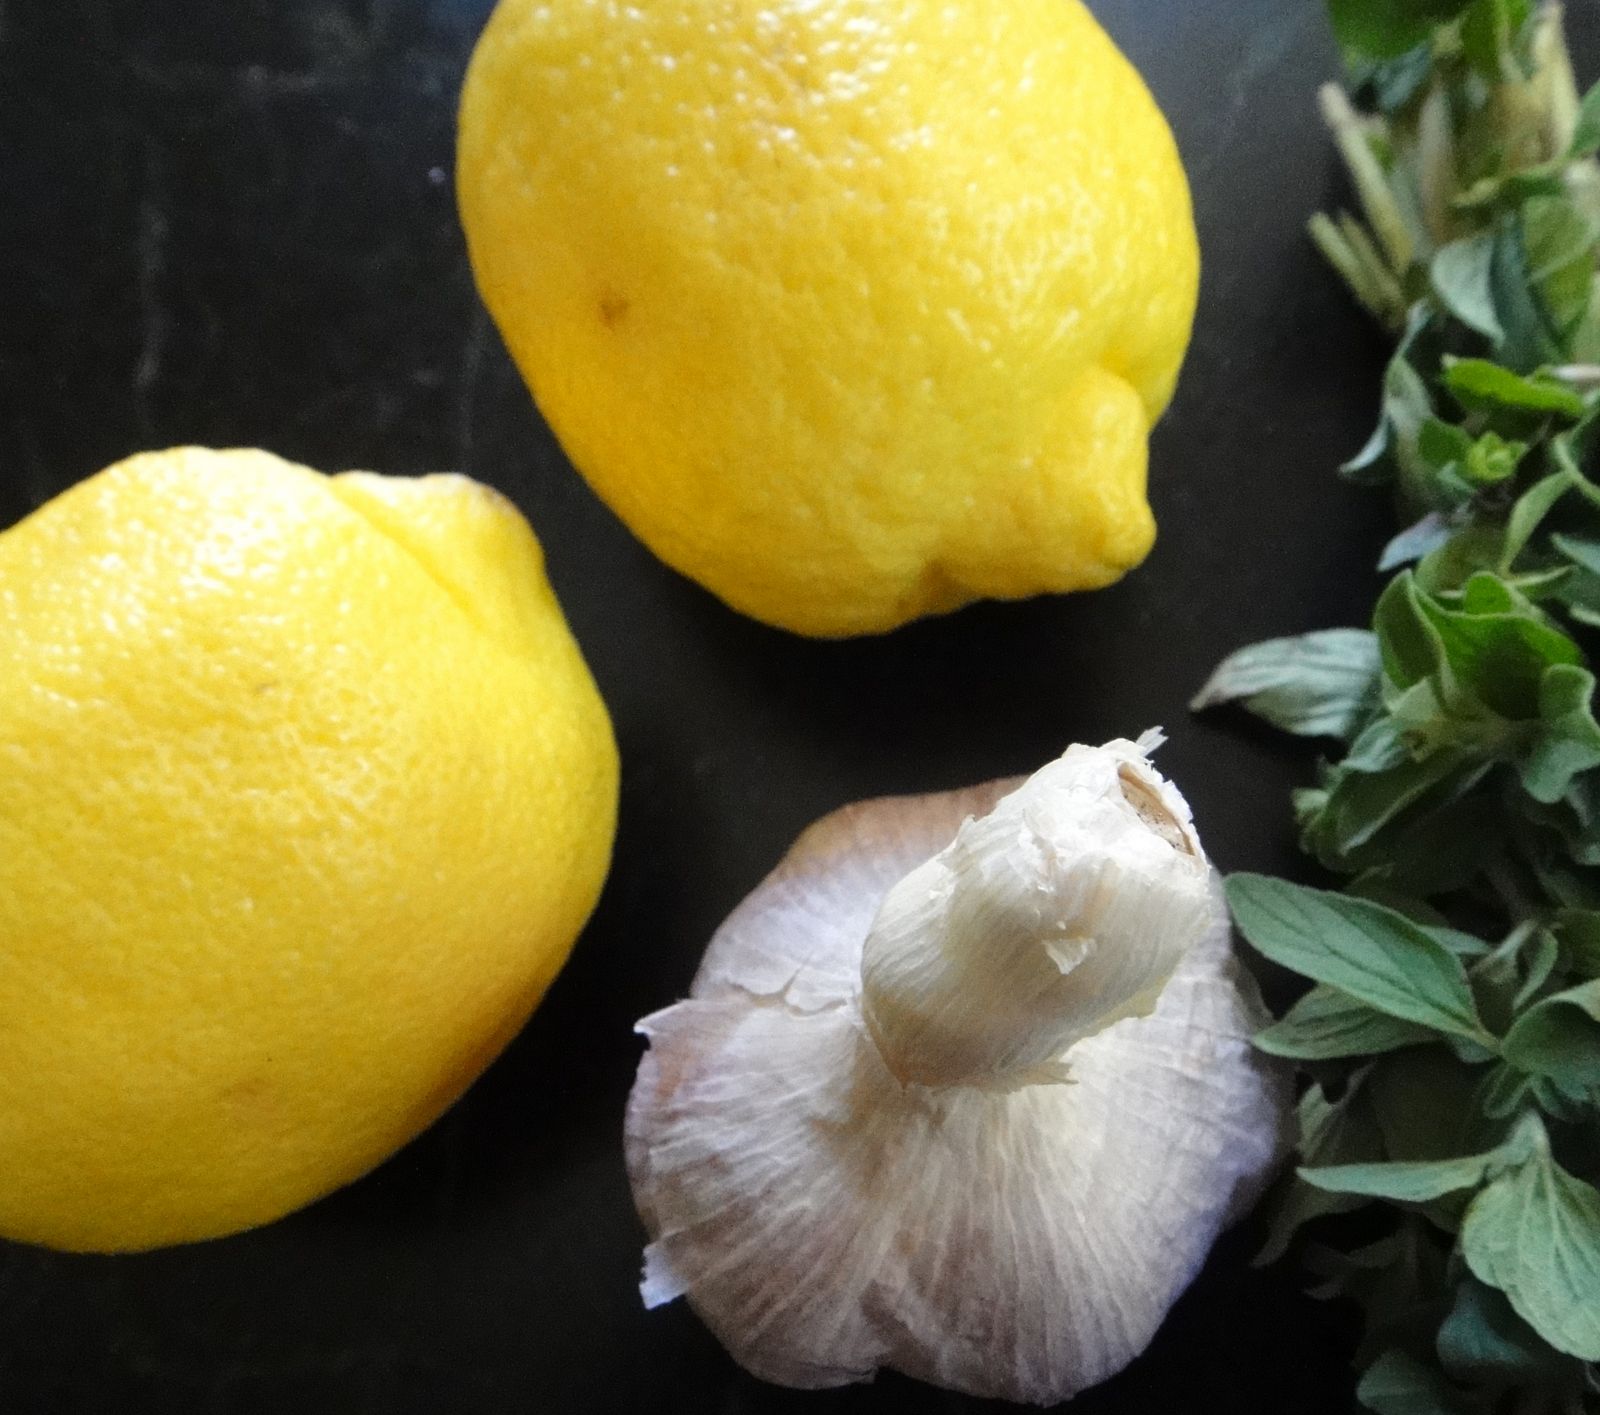
1 lemon
2 large garlic cloves
1 bunch fresh marjoram
Salt and freshly ground pepper

1. Preheat the oven to 425°F.

2. Rinse chicken inside and out and dry well with a tea towel.

3. Generously sprinkle the inner cavity with salt and pepper. I like to use finely ground seasoned sea salt from France.

4. Quarter the lemon, chop the unpeeled garlic cloves in half and roughly chop a generous portion of marjoram. Stuff as much as will fit into the chicken, starting with a piece of lemon, tucking in a few sprigs of marjoram, adding garlic liberally, until you have used as much of the flavourings as possible. Pour a tbsp of olive oil into the cavity.


5. Using kitchen twine, truss and tie the chicken. Rub the outside with olive oil, season with salt and pepper and place in a roasting pan with rack.  I have recently used my Le Creuset casserole very successfully, using rolled aluminum foil to create a makeshift rack.

6. Place the chicken the chicken in the oven, uncovered, breast side up, and roast for 1 to 1 ½ hours (the general rule of thumb is to cook chicken for 20 minutes per pound), until juices run clear when the thigh is pierced. If you’re using a thermometer, the internal temperature should be about 165°F.*

7. Let the chicken rest for a few minutes so that the juices settle. Cut into pieces and put on a serving platter, squeezing the lemons that were in the chicken over the pieces. Alternatively, you can deglaze the roasting pan with the lemon juice and some white wine, and reduce the juices to a lemony sauce.


*Full disclosure: I have a Turbo Chef, so that beautiful bird is fully cooked and ready in less than 30 minutes. For those of you with high speed ovens, follow the directions. Many roast chicken recipes suggest an initial cooking for 15 minutes at 425°F, and then reducing the heat for the rest of the cooking cycle. Experiment! It's so easy and worth the time and minimal effort to get oh-so-juicy chicken.


October 23, 2010

Cheers to the Weekend: The Marlatini

The birthday girl at a recent visit to Sketch

It’s the weekend, and it’s time for bottoms up! This deliciously fruity drink was concocted by my niece Marla, and in honour of her birthday today, we’re raising a glass to toast her. Cheers, Marla, and many, many more.

The Marlatini
makes one very generous drink, or two to share

1 oz Cointreau
1 oz Chambord
1 oz Limoncello
(if you adjust these amounts to make one drink, do so in equal measure; eg ½ oz each Cointreau, Chambord and Limoncello)

3 oz cranberry juice
3 oz orange juice
(if you adjust these amounts make one drink, do so in equal measure; eg 2 oz each cranberry and orange juice)

Optional
2 oz club soda

Pour all ingredients into a cocktail shaker filled with ice. Shake well and strain into a large martini glass. Serve with a twist of lemon or orange.

I love this all-in-one shaker that allows me to measure and shake easily

Shake it baby, shake it!

If you're using the original portions, be sure you have a big martini glass!

Bottoms up!


October 19, 2010

Eat to the Beet: Fabulous Roasted Beet and Grapefruit Salad

Autumn's market bounty

It’s here – that time of year when the fresh produce of fall’s bounty slowly starts winding down and is replaced by sturdy root vegetables. Still, the market was full of colour this Saturday: brilliant sunshine taking the chill off of the October air; gerbera daisies still in abundance from Milan at Bizjak Farms, along with tables laden with apples; multi coloured beets and kale from Ann at Wooler Dale Farms.

We let the season guide us, a Sunday brunch in the offing. Those candy coloured beets were a must and with a new issue of LCBO’s Food & Drink on hand, featuring Ontario’s harvest and plenty of beet recipes, we were set for at least one star attraction on the menu.

Roasted Beet and Grapefruit Salad
adapted from Food & Drink magazine

serves 4

8 baby beets, multi-coloured, trimmed
¼ c water
Salt and pepper
3 small ruby red grapefruit
1 tbsp grapefruit zest
1 tsp honey
1 tsp grainy mustard
¼ c canola oil
6 c mixed salad greens
¼ c thinly sliced red onion
¼ c Marcona almonds
4 oz soft goat cheese, crumbled (we used Grappa soaked goat from Monforte)

1. Preheat oven to 400°F.

2. Trim beet leaves to ¼ inch from beets, and trim off root end. Scrub beets well, and place in a baking dish with the water. Season with salt and pepper, cover with foil and roast until beets are tender, about 45 minutes. Let cool, covered, until cool enough to handle. Trim stalk ends and peel off skins. (Peeled beets can be wrapped and refrigerated for up to 2 days).

Trimmed beets, ready for roasting

The colours are still vivid after roasting

Don't worry - your fingers won't stay stained!

Nature's beautiful colours

3. While the beets are roasting, make the dressing. Finely grate 1 tbsp zest from a grapefruit. Squeeze half a grapefruit to yield 3 tbsp juice. Whisk together zest, juice, honey, mustard, and salt and pepper to taste. Gradually whisk in oil. (Dressing can be refrigerated for up to 8 hours before serving. Whisk again before using).


4. Cut the beets into wedges and toss with 2 tbsp of dressing. Cover and let stand for 30 minutes or refrigerate for up to 8 hours. Cut the two remaining grapefruit into segments, removing pith. Grapefruit can also be prepped in advance, covered and refrigerated.

5. Just before serving, toss salad greens with half the remaining dressing. Top with beets, grapefruit, onion, almonds and cheese. Drizzle with remaining dressing, toss lightly, and serve.


An entertaining note: even for brunch, it's fun to start with an "appetiser".  Since ours was a savoury brunch for six, we started with yellow pepper sippers, a nifty way to serve this fabulous yellow pepper recipe.

.

October 06, 2010

Sweet Treat: Lemon Panna Cotta with Balsamic-Scented Strawberries

When it comes to dessert, I'm more of a cheese girl.  Give me a nibble or two of Comté , tempt my palate with Piave, let me get cosy with an award-winning Canadian clothbound cheddar.  Savoury over sweet has always held sway with me.

But even so, I do indulge in sweet treats, and more than occasionally.  When I do, it's the rich-creamy-whipped-cream variety that has the most appeal.  Simple is best; and if the dessert has lemon, it goes up a decided notch.  When I first had this gorgeous lemony panna cotta at a friend's house, I knew it would immediately become part of my repetoire.  Three steps, and a bit of planning, and I have a delicious treat that gives me pause before reaching for the cheese tray.

Lemon Panna Cotta
serves 8

This make ahead dessert is light, so it's perfect after a rich meal.  Served in pretty cups instead of ramekins, it becomes a beautiful centrepiece for a brunch gathering.  Top the panna cotta with fresh strawberries scented with balsamic vinegar.

1 envelope unflavoured gelatin
¼ c cold water
⅔ c sugar
2 c whipping cream, divided
⅓ c lemon juice
1 tbsp grated lemon peel
1 tbsp vanilla bean paste
1 c Greek style yogurt

1. Sprinkle gelatin over cold water in a small saucepan. Let sit five minutes. Warm gently until gelatin dissolves.

2. In another medium saucepan, gently heat sugar and half the cream. Cook just until sugar dissolves. Stir in lemon juice, peel and vanilla paste. Whisk in dissolved gelatin and cool 10 minutes. Whisk in remaining cream and yogurt.

Lots of lemony peel give the panna cotta a wonderful zing

Be sure to use thick Greek style yogurt - this is not the time to go for low fat

3. Divide mixture between 8 ramekins. Chill until set, at least two hours.

Our teacup collection is the perfect receptacle for the panna cotta

Balsamic-Scented Strawberries

While the panna cotta is chilling, prepare a fresh strawberry topping.

1½ c fresh strawberries, hulled and quartered
2 tsp balsamic vinegar
2 tsp sugar (more to taste)

Mix the berries, vinegar and sugar in a bowl. Set aside to macerate. When ready to serve the panna cotta, spoon some berries and their juices on top of each dish.


Pretty cups for a pretty dessert

September 27, 2010

Discovering Japan: Creamy Edamame Soup with Shichimi-Togarashi

Tokyo is a weird and wonderful place. On the surface, it shouldn't work as well as it does.  Millions of people crowded into a very tiny space.  Incomprehensive street addresses (every taxi driver struggles to find your destination, GPS working overtime, map scrutinized at every light).  A subway system that spiders all over the city in a confusing web of intersecting lines.  No English signs in sight, and barely more "English spoke here" places.  What pulls it all together is the Japanese themselves.  Unfailingly courteous and interested, the Japanese make strangers feel welcome and cared for.  Even if you're not 'xactly sure what you're eating. 

Barbecued eel for lunch, in a restaurant that served nothing but

There are so many things to love about Tokyo, but what I love most is the reverence with which food is held. The Japanese worship at the altar of seasonality, each piece of fruit, each specialty food item sacred. Food is not merely sustenance; it’s something to be savoured, appreciated, each meal a leisurely exploration of every taste.

Wasabi grating in action at Seamon

Nowhere is this reverence more apparent than in the hundreds of tiny food shops that dot the city. Many have been in business for decades, honing their expertise in either crafting or choosing the very best. Many sell just one thing – a certain type of pickled plum, say, or Japanese omelettes (come early – the shop closes when the omelettes are gone).  On a recent trip to Tokyo, and with Food Sake Tokyo* as our bible, we set out on the trail to find culinary treats to take home. Musk melons at $250.00 were out of the question (and, yes, that’s not an incorrect decimal point!), as was fresh wasabi, seen grated a la minute at sushi counters throughout the city.

About $250USD for two - and perfect in every way

Fresh wasabi - slightly more reasonable at about $16USD

Spices seemed like a good bet, and how could we not visit Yagenbori, in business since 1625, and the proud originators and purveyors of Shichimi-Togarashi? This wonderfully complex seven spice blend gives dishes deeply subtle nuances of flavour.  It's a medium-spicy blend of seven ingredients: black sesame seeds; the dried peel of the unshu mikan (Satsuma orange); Japanese sansho pepper; dried capsicum; roasted dry capsicum; hemp seeds and poppy seeds.

The delicious mixture for Shichimi-Togarashi

While your spices are being packaged you can choose a traditional wooden shaker

I knew exactly what I wanted to try it on when I got home – my attempt to recreate a cold and creamy edamame soup I had in Tokyo that was so so good. The soup turned out to be incredibly easy, and with fresh edamame still available at the farmers’ market (and frozen a grocery store away), edamame soup is as easy as one-two-three.

Creamy Edamame Soup
serves 4-6

Edamame beans, fresh or frozen, enough to yield two cups shelled
1 shallot, sliced
2 c chicken soup stock
½ tbsp vegetable oil
1½ c fresh buttermilk or skim milk
1 tbsp fresh butter
Salt and pepper to taste
Shichimi-togarashi for garnish (optional - you can order it here)

1. Boil edamame beans. Shell edamame and also remove the fine skin on the beans. While this may seems like an additional step, it will yield an ultra smooth soup.

2. Heat oil in a saucepan and sauté shallots. Add chicken soup stock and edamame, bring to a boil, and simmer for 30 minutes on low heat.

3. Puree the edamame beans, and put back into the saucepan. Add the buttermilk and butter. Simmer for 5 minutes on low heat. Add butter, salt, and pepper to season.

Fresh edamame beans - beautiful variations of colour

The buttermilk yield from homemade butter

Final step to soup...

This rich, delicious and nutritious soup is fabulous served either warm or cold. Serve it in small cups as a starter, or in shot glasses for a wonderfully different appetiser.

A taste of Japan

*If you visit Tokyo, you need a personal guide to help you navigate. The newly published Food Sake Tokyo is all you will need. A carefully edited and lovingly assembled collection of all things food, chef and former depachica sommelier Yukari Sakamoto turns even the shortest trip to Tokyo into a culinary adventure. Check out her blog for up to the minute tips and tastes.