July 14, 2011

Dinner Tonight: Braised Halibut with Cherry Tomato-Caper Sauce


There are certain distinct advantages to having a husband who works from home.  Pesky errands that can be done during the day.  Laundry that magically appears, folded and clean (really!).  A back up plan for unexpected emergencies (like the time that a heel broke off my shoe at work and Richard delivered another pair to me).  And best of all, dinner ready when I come home.  As much as I love to cook, I have surrendered to the luxury of the simple, delicious and healthy meals that await, no matter what time I arrive. 

Fish is a frequent Richard choice, and halibut is a particular favourite.  Now that tiny delicious local cherry tomatoes are starting to appear, this easy dinner dish is one you must try.  Pour a glass of crisp and fruity white wine, and raise a glass to your partner.  No matter who made dinner tonight, every meal is a chance to be grateful for sharing it together.

Braised Halibut with Cherry Tomato-Caper Sauce
from the 5-Factor World Diet, by Harley Pasternak and Laura Moser

2 halibut fillets (about 5 ounces each)
Salt and pepper
2 tsp olive oil
1  cups cherry tomatoes cut in half
2 tbsp capers, drained and rinsed
2 tbsp lemon juice

1.  Season the halibut with salt and pepper. In a non-stick skillet, heat 1 tsp of the olive oil over medium-high heat, add the fish and cook for five minutes per side, or until cooked through. Transfer to a platter and cover to keep warm.

2.  In the same skillet, heat the remaining olive oil over medium-low heat.  Add the tomatoes, capers and lemon juice to the skillet, and cook for a couple of minutes, or until the tomatoes are softened but not completely cooked.  Plate the fish, spoon the sauce over the halibut and serve with crusty bread.

July 02, 2011

Summer Canning: Strawberry Jam with a Thai Twist


Of all the summer fruits, strawberries always struck me as being a bit prosaic, and slightly disappointing.  Maybe I've been jaded by years of eating out of season flavourless berries, pristinely perfect under their cello wrappers, but without a smidge of sweetness. Or maybe it's the memory of those big jars of Kraft jam, brimming with sugar and big blobs of fruit that tasted like nothing resembling the real deal.

So when I started canning for the first time last year, making strawberry jam wasn't on my radar.  But the appearance two weeks ago of the season's first strawberries was pretty hard to resist, especially a flat of organcic berries from Belanger Organic Farms.  Armed with a lot of berries and eager to get the season's canning underway, I finally made my own strawberry jam, adding a bit of a Asian twist.  The results reminded me why strawberry jam is the most popular flavour by far.  And if you're not inclined to make your own, click here to read which producers are still making strawberry jam and preserves the good old-fashioned way.

Strawberry Jam with a Thai Twist
yield: 8-10 ½ pint jars

This jam calls for lemongrass and kaffir lime leaves, ingredients traditionally used in Thai cuisine.  The additon of these ingredients while cooking the strawberries impacts a brightness to the jam's flavour and cuts through the sweetness.  If these ingredients aren't readily available, the jam can be made without them.

Note: If you haven't canned or made jam before, see my post on Plum Jam for a  step-by-step tutorial.

5 quarts organic strawberries
10 c sugar
1¼ c lemon juice, plus ¼ c as needed (reserve rinds and seeds)
5 fresh kaffir leaves
2 stalks lemongrass, trimmed and cut into four pieces

1.  Wash, hull and slice the strawberries.  Combine the berries with the sugar and lemon juice in a non-reactive pot or large bowl, and macerate for at least 4 hours at room temperature to let the flavours and juices develop.  Tie the reserved rinds and seeds in cheesecloth and set aside.
 
2.  Put the berries and all the juices and sugar in a large stockpot, along with the reserved lemon rind and seeds, the kaffir leaves and the lemongrass.  Bring to a boil and then to a rolling simmer, skimming off the foam as it forms.  Continue cooking, stirring occasionally, for 30 to 45 minutes, until the jam reaches the jell point.  If the jam is not setting, add a little more lemon juice.
 
3.  Once the jam is ready, discard the kaffir, lemongrass and lemon rinds, ladle the jam into prepared jars and process for 10 minutes.  Remove from water, cool and store.


Summer's seasonal sweetness, captured to enjoy year round
      

June 21, 2011

In Season: Risotto with Spot Prawns and Asparagus


Seasons are fleeting.  And so their bounty is all the more precious for being so ephemeral.  Two of my favourites, spot prawns and asparagus, are already towards the end of their peak.  And although it's true that a good fishmonger will have frozen spot prawns throughout the year (Fisherfolk for example), and that asparagus is a staple in every grocery store year round, it's in season goods that I crave.  The perfect dish to showcase fresh spot prawns and asparagus so tender that you can eat the whole stalk?  A delicious al dente risotto, ready in minutes and savoured slowly.  As summer offically starts, this may be the last weekend to make this wonderful dish.

Risotto with Spot Prawns and Asparagus
serves two

A note on the recipe:  Whenever we cook shrimp, I save the shells and freeze them.  They make an excellent base for a delicious shrimp-flavoured broth that adds depth to soups and dishes such as this.  If you do not have shells available, increase the amount of chicken stock to 4 cups and skip steps two and three of the recipe.

8-10 oz fresh spot prawns
2 tbsp each lemon juice and lemon olive oil or extra virgin olive oil*
Shells from 2 lbs shrimp
2 c water
½ tsp salt
2 small carrots
4 small stalks celery, preferably from the tender heart
1 large shallot, peeled and halved
2 tbsp olive oil
2 oz pancetta, minced
1 lb asparagus, trimmed and cut into ½ inch pieces**
1½ c Arborio rice
½ c white wine
2-3 c chicken stock

*We love Olivers and Co.'s Lemon Specialty Olive Oil for its bright taste and unique flavour. It's terrific on salads with a little balsamic and salt and pepper. Use regular extra virgin olive oil if lemon flavoured oil is not available.

**If you've got your hands on really fresh asparagus, don't snap the ends off - simply trim the tough outer skin at the bottom of the stalk and use the whole darn thing. 

1. Combine the lemon juice, olive oil and shrimp in a small bowl and marinate.  Proceed with shrimp broth while shrimp are marinating.

For shrimp broth:

2.  Combine shrimp shells, water and salt and bring to boil.  Lower heat and simmer for 5 minutes.  Strain shells, reserving liquid in the pan.

3.  Bring the liquid to a boil, adding the carrot, celery and shallot, lower heat and simmer for 30 minutes. Cool slightly.  Puree broth to incorporate carrot, celery and shallot thoroughly.  Set aside and proceed with recipe.

4.  To cook shrimp, grill or broil with their shells until just cooked through.  Cool slightly, peel and set aside.

5.  Heat chicken broth and keep to slow simmer over low heat.  In a separate pot, heat shrimp broth and keep to slow simmer over low heat.

6.  Mince remaining carrot, shallot and celery.  Heat olive oil over medium heat, add vegetables and pancetta, cook for two minutes, until vegetables are slightly translucent and pancetta sizzling. Add rice and sauté for a further two minutes or until rice is well coated.

7.  Add white wine and stir until wine is absorbed. A cup or so at a time, and alternating between the pureed shrimp broth and chicken stock, add the liquid to the rice, ensuring that the liquid is thoroughly absorbed before adding more liquid.  This step should take about 20 minutes; your goal is to have rice that is firm (al dente) in the centre but tender.

It's worth taking a moment and hearing from Marcella Hazan on how much liquid to use in risotto:
The quantity of liquid given [in a risotto recipe] should be considered an approximate amount.  You may end up using less or slightly more than indicated, but this is not significant.  There are too many variables involved to be able to establish a "correct" amount of liquid.  What is important is never to cook risotto with too much liquid at one time, and to bring it to its final tender but firm-to-the-bite stage so that it is creamy but not saturated.
8.  Ladle the finished risotto into shallow serving bowls and garnish with the cooked spot prawns.  And there you have it. A beautiful spring-into-summer dish full of seasonal goodness.


May 28, 2011

On the Lamb: Harissa-Rubbed Lamb Chops with Charmoula


As a part-time food blogger and full time food freak, my antenna is always up for delicious things to make, eat and blog about. More and more, I’m cooking and posting original recipes that I’ve either perfected or – through pure blind luck and some modicum of skill – managed to create from the season’s best.

But sometimes, the clamour for a recipe outweighs my desire to be original. And that clamour was resounding last week when I made Bonnie Stern’s amazing Harissa-Rubbed Lamb Chops with Charmoula, from her wonderful Friday Night Dinners cookbook. With a houseful of people – 14 to be exact – all of them passionate about great food and wine, we wanted to serve something that was foolproof fabulous. And while our Butter Crunch Salad, Quinoa with Dried Cherries, and Rosemary-Roasted Salmon were all hits, the star of the show was the finger-licking good, garlicky, sweet-and-spicy chops. Easy, beautiful and tasty – a triumvirate that you can’t beat.

Harissa-Rubbed Lamb Chops with Charmoula
serves 10 to 12

For maximum flavour, we marinate the lamb a day ahead and refrigerate, and make the charmoula a day ahead too. We sear the lamb the next morning, and refrigerate until ready to cook and serve. So all that needs to be done for dinner is finish cooking the lamb.

You can also freeze the rack of lamb after searing. Just defrost, make the charmoula and finish off the lamb. We did just that last night, and had a ready-made Friday night dinner of our own in 30 minutes flat.

For the harissa:
½ c olive oil
4 cloves garlic, minced
1 tbsp smoked paprika (seek it out – the distinct flavour can’t be replicated with just regular paprika)
1 tbsp ground cumin
2 tsp kosher salt
1 tsp cayenne or hot pepper sauce
4 racks of lamb

For the charmoula:
1 c olive oil mayonnaise
2 cloves garlic, minced
1 tbsp lemon juice
1 tsp hot red pepper sauce
½ tsp ground cumin
1 tbsp smoked paprika
2 tbsp finely chopped fresh cilantro

1.  Make the harissa by combining all of the wet and dry ingredients in small bowl. Rub every last bit into the lamb. If making immediately, leave on the counter; if holding to cook later, place in a casserole dish, cover and refrigerate (overnight if desired).

2. Make the charmoula by combining all ingredients in a small bowl. Refrigerate until ready to use, bringing to room temperature before serving.


3. If finishing the dish immediately, preheat the oven to 400°F. In a large roasting pan over medium high heat, sear the lamb racks, meaty side down, until browned. Transfer the racks to lined rimmed baking sheet, bone side down, and roast for 20 to 25 minutes for medium rare. Alternatively, grill the racks on a gas or charcoal babecue to enhance the smoky flavour.

4. Slice the lamb into chops, place on a platter, and serve with the charmoula on the side.


May 17, 2011

In Season: Orrechiette with Fiddleheads, Wild Ramps and Spot Prawns


Although it's been wet, rainy and just too darn cold for spring to feel like it's really here, it hasn't stopped all the beautiful green things from breaking ground. At last week's farmers' market, amongst the cold cellar apples and farm fresh eggs, there was spring bounty to be had: asparagus big and fat and firm, sandy ends still damp; fiddlehead ferns, tightly coiled and emerald green; and that most fleeting and prized of spring greens: wild ramps, the leek's kissing cousin.

Like all things fresh and green, simple is best: a steam, a sauté, the earthy flavours enhanced and set off by doing less with more. For a rainy and chilly Saturday night dinner, nothing could be simpler than this pasta dish: hearty enough to stave off the cold and made deliciously seasonal with those wonderful greens. But hurry…summer is almost here, and those wild green things that are spring’s harbingers will once again disappear.

Orrechiette with Fiddleheads, Wild Ramps and Spot Prawns
serves two

When I was searching for a recipe to use my greens, a quick internet search led me to one of my favourite blogs: Marc Matsumoto’s No Recipes, with fabulous simple-to-make recipes and even better photography. His take on this pasta dish calls for lots of freshly grated cheese. Instead, I chose to use wild spot prawns and give the dish a bright briny flavour, perfect to complement the deep green of fiddleheads and wild ramps, and added some of my house cured pancetta for extra complexity.

1 c fiddleheads, cleaned thoroughly
8 oz orecchiette pasta
1 tsp extra virgin olive oil, plus 1 tbsp
2  oz fresh pancetta, diced
½ lb. wild ramps, white and pink parts only, chopped
10 spot prawns, shelled and deveined
½-1 cup good quality tomato sauce (the thicker the sauce, the less you should use)

Be sure to seek out distinctive - and distinctively flavoured - spot prawns for a real taste of the sea.  We get ours from Fisherfolk

1.  Rinse fiddleheads thoroughly in cold water and trim any brown ends.  In a medium pot, steam until tender-crisp, about 8-10 minutes. Rinse in cold water and set aside.


2.  While fiddleheads are cooking, begin cooking pasta according to pasta directions, until just al dente. Drain and reserve 1 cup of cooking liquid.  Stir a tsp of olive oil through pasta to keep from sticking, and set aside.

3.  Heat oil over medium heat in a medium pot and sauté pancetta until lightly browned.  Add the wild ramps and sauté for two minutes.  Add the fiddleheads and the prawns, and cook until the prawns are just cooked through and opaque. 

Reserve the leafy green tops for your morning omelette

4.  Add the pasta and tomato sauce, and stir to combine, adding some of the cooking water if needed to ensure the pasta is evenly coated with sauce.  The sauce is meant to complement, not overwhelm, the dish.  Serve in two shallow heated bowls with a crisp cold Riesling. 

May 02, 2011

Just Ducky - Duck Prosciutto and Rapini Crostini with Buratta


My niece is a declared vegetarian. Starting first with meat, and not much of a seafood eater, it’s been a process of food group elimination, driven as much, if not more, by personal taste as by philosophy. Things got complicated when, at 13, she expressed an interest in a career as a chef, as she knew that going through culinary school would be well nigh impossible without eating – or at least tasting – meat.

While the culinary career has long been abandoned in the pursuit of a business degree (captains of industry being much more likely to make millions than a chef), I think I’ve always known that someday, meat would make a comeback in her diet. But even I wasn’t prepared for her casual announcement one day that, indeed, she had started eating meat again. Specifically salume and prosciutto. But, she was quick to assure me, she was still a vegetarian otherwise.

As I continue my adventures in meat curing via Charcutepalooza this year, I offer up this dish in honour of my not-quite-a-vegetarian niece. I don’t know that a steak is on her horizon any time soon, but I’ll gladly sit down to a meal of charcuterie with her any time.

Duck Prosciutto and Rapini Crostini with Burrata

This duck prosciutto was the first Charcutepalooza challenge, and was what convinced me that there wasn’t any great mystery to curing meats other than patience, lots of salt and a trusted guide. The guide comes in the form of Michael Ruhlman’s Charcuterie. And while you’ll have to buy the book to find out how to make the prosciutto (or take the easy route and just buy some readymade), I’ll gladly share my crostini recipe with you here.

1 bunch rapini (broccoli rabe), trimmed, washed and chopped
1 large clove garlic
¼ c chicken stock or water
I tbsp olive oil, plus ½ cup
1 small French baguette
8 oz ounces duck prosciutto, thinly sliced
1 lb burrata cheese
Maldon or other finishing salt

1. Heat 1 tbsp olive oil over medium high heat in a medium non stick skillet. Mince garlic sauté quickly in oil; be careful not to brown. Add rapini, chicken stock or water; lower heat to medium, cover and saute until rapini is tender-crisp. Remove from heat, drain any remaining liquid and set aside.


2. Slice baguette on the diagonal into ½ inch slices, brush each slide with olive and grilled or broil until lightly browned. Set aside.


3. Using a serrated knife, slice the burrata cheese into thick slices and set aside.

4. Place a generous tablespoon or two of sautéed rapini on each baguette piece. Place a couple of slices of duck prosciutto on top of the rapini, add a slice of burrata and finish with a generous pinch of Maldon salt.


April 02, 2011

Toronto Bakes for Japan - Spread the Word!


Thanks to the fabulous work of Heena and Niya at Tiffin Tales, the entire city is banding together to bake and raise funds for Japan in the aftermath of the terrible tsunami.

I'll be participating on April 10 by baking up a storm of mini fennel-olive oil bread loaves to sell. You can participate too - even if it's by buying some of the delicious products that will be available for sale at five locations across the city.

Read more here and help out if you can.

March 08, 2011

Salad Days: Spanish Green Salad with Tuna and Beans

I dream about having the perfect pantry. One that produces, as if by magic, exactly the right ingredient when I need it. Walnut oil, say, or canned escargots. Clam juice, hearts of palm, Picholine olives. That je ne sais quoi needed to finish a dish, add an unexpected touch, make a dish genius instead of just good.

And then I make something simple for dinner, with every ingredient on hand, and the can opener close by. Really good quality canned tuna. Mixed beans. Sherry vinegar and excellent olive oil. A blend of greens. Finishing salt and lots of freshly ground black pepper. In any sort of combination, this rustic and simple salad is a reminder that the basics in your pantry really can combine to make a perfect dish. And that, my friends, is genius.

Spanish Green Salad with Tuna and Beans
serves one very generously for dinner, or two if you add good crusty bread and butter and lots of crisp white wine

Why Spanish?  While this type of salad can be typically be found in Italy, I've given it a twist en Espanol by using Ortiz tuna, Spanish sherry vinegar and Spanish olive oil.  The tuna is premium, and hard to find here; I bought this 250 gr can in London for the equivalent of $9.66.  It's line caught, packed in olive oil and worth seeking out.

According to a Spanish proverb, four people are needed to make a good salad: a spendthrift for oil, a miser for vinegar, a counsellor for salt, and a madman to stir all up

4-6 cups mixed greens: a combination of sturdy crunchy greens like romaine hearts and spicy soft greens, like baby arugula
1 250-gram can of tuna packed in olive oil
½ c mixed beans
Sherry vinegar and olive oil to taste
Plenty of freshly ground black pepper
Maldon salt, or other large and flaky finishing salt

1. I a large bowl, tear romaine leaves into bite size pieces. Add a couple of handfuls of arugula. You can also add a small amount of micro-greens: I used super-healthy micro broccoli greens. Toss to combine.

The layering effect of coarse to micro is very pretty

2. Drain the tuna and add to the salad, breaking any bigger chunks into smaller pieces as you do. Top with the beans. Add the vinegar and olive oil to taste, and finish with a generous sprinkling of pepper. Toss to combine.

3.  Divide between two plates, season generously with salt and serve.

February 22, 2011

The Pig and I: Pancetta Cups with Duck Eggs for Charcutepalooza

I guess you could say my relationship with the venerable pig began when I was kid. I can’t remember exactly how old I was when I saw my first dead pig, but I can say with certainty where it was: in our basement. Every year, my father would buy a pig, sharing the cost with several friends. Without warning, there it would be: hanging in the basement, mute and huge and, well, dead.

Funny about that – while I can remember those pigs, and the very first time I dared to touch one, I can’t ever remember being afraid or repulsed. I knew, even back then, that the pig would yield all manner of good things. And because it was there, in the house, it seemed normal; just another thing that my parents did, like making bushels of tomatoes into sauce, ravioli by hand, or batch after batch of pannetone, the golden loaves filling the small kitchen table. Didn’t every family butcher their own pig?

The ritual was the same. The long trestle table would come out, and the men would gather in the basement, working throughout the day to butcher the pig and divide the spoils. Our wine cellar, dank and dark and smelling of earth, would be the beneficiary of the day’s work. Hanging over the demijohns where we were sent to get the evening’s bottle of wine were the sausages and the salamis. Into the freezer went the pork chops and ribs. I don’t exactly know where we kept the musetto, that peculiarly Italian squat sausage that my mother would cook in hearty minestrone thick with beans, but I do know that I miss the taste of it still.

My father, preparing charcoal for an impromptu barbecue in the park

Of course, I didn’t exactly hang around for the butchering part. But the space of years and distance and parents long gone makes me yearn for a time machine, one that could bring me back to that basement, those days, that ritual.

Fast forward to today, where I still revere the pig and all its glorious parts, never really thinking about making more than a roast or ribs. And then I read about Charcutepalooza. Cue the angels singing and the clouds parting. Could I, would I dare myself to make my own prosciutto, pancetta and bacon? Damn right I would!

Late to the game, I’ve been furiously salting duck breasts and pork belly. The extra fridge in the basement has been divested of its bottles of wine and turned into a curing spot. Cheesecloth and butcher twine bought, curing salt procured, jubilation abounding.

And finally, my first Charcutepalooza post, featuring duck eggs cooked in pancetta cups with mushrooms, parsley and cheese. Never has a dish tasted more satisfying, or connected me more to my heritage. My father would be proud.

For this Charcutepalooza challenge, I chose to make the pancetta.  The pork belly, from Cumbrae's, was one gorgeous piece of pig.


Richard was away, so rolling the belly solo was impossible. Here's the belly after curing for seven days, wrapped and hung flat

Beautiful marbling for my first pancetta attempt!

Duck Eggs in Pancetta Cups with Porcini Mushrooms and Cheese
serves two or four

These little eggs cups can either form the main course of breakfast meal or be a mini side dish for a brunch.  Serve two per person if they are the main event.  They're baked in steps, to allow each element of the dish to cook to perfection.

½ lb piece pancetta (not sliced)
3  oz dried porcini mushrooms
1 small garlic clove, minced
2 tbsp chopped parsley, divided
½  tbsp each unsalted butter and olive oil
Sea salt and freshly ground pepper
4 duck or chicken eggs
2 oz hard goat cheese, cut into thin 2 " strips

1.  Preheat oven to 400°F, with the rack in the middle position.

2.  Reconstitute the mushrooms in 2 c boiling water for 20 minutes. 

3.  While the mushrooms are reconstituting, slice the pancetta into 4 ⅛-inch x 4-inch strips.  Grease 4 of the cups in a regular muffin tin, and line them with the pancetta, around the sides and the bottom.  Set aside.  Separate the eggs, being careful not to break the yolks.  Set the yolks aside in their shells, and put the egg whites in a pourable measuring cup.

4. When the mushrooms are ready, drain, rinse and chop finely.  Heat the butter and oil over medium heat in a small skillet, and when the foam subsides, add the garlic.  Sauté, stirring, for a minute and then add the mushrooms and one tbsp of parsley.  Continue sautéingstirring, until the ingredients meld and are fragrant, about two minutes more.

5.  Add a generous tablespoon of the porcini mixture to each cup.  Divide the egg whites between the cups.  Place the muffin tin in the oven and bake for 10-12 minutes, or until the egg whites are just set.*  Take the tin out of the oven, top each cup with an egg yolk and put back in the oven, baking a further 2 minutes. 
 
*Duck egg whites are particularly unctuous and take longer to cook.  If you are using regular eggs, you may want to bake the pancetta cups for five minutes first, and then add the mushrooms and egg whites and shorten the baking time for the egg whites.  The important thing is to allow the various layers to cook thoroughly without overcooking the eggs.


6.  Take the tray out, top with the cheese, and broil for 5 minutes, or until the cheese is melted and bubbly.  Sprinkle the remaining parsley on top of each cup.
 
7.  To serve, scoop the cups out carefully with spoon and place one or two of the cups on a serving plate.  Serve with hot buttered toast to dip into the egg yolk, which will be creamy and thick.
 

February 18, 2011

Something Fishy: Halibut with Meyer Lemon, Olives and Fennel

It’s a funny thing about seasonality. We tend to associate that with the abundance of summer and fall, when Nature spoils us with an
embarrassment of riches. Winter is a crueler time, stoic and practically begging for the hearty dishes that fill and nourish us. But even now there's a seasonality uniquely of the moment that makes lighter dishes and tastes possible and welcome.

I’m thinking about Meyer lemons a lot these days. I hope they won’t become a year round thing; foods should be savoured for their fleeting appearance, valued because they are that much more uncommon. And there’s something about these sunny lemons that makes me think of the Mediterranean: of lazy afternoons, warmth and indolence. I'm thinking of myself sitting at a café table for one, the mysterious woman with the fabulous hat and Jackie O shades, delicately eating a light and tasty fish dish that’s drenched with lemons, olives, fennel. I’m thinking I just might make this for dinner again tonight.

Halibut with Lemon, Olives and Fennel
serves two

1 lb halibut fillet
2 Meyer lemons, thinly sliced
1 fennel bulb, trimmed and thinly sliced, fronds reserved*
½ to ¾ c assorted good quality Mediterranean olives
2½ c olive oil
Fine sea salt and freshly ground pepper to taste
A good finishing salt, such as Maldon (optional)

Poaching firm fleshed fish in olive oil and cooking in a low heat oven is a wonderful way to prepare halibut. Surprising, the oil doesn’t absorb into the fish at all.

1. Preheat the oven to 250F°. Rinse and pat the fish dry and season with salt and pepper. Use a light hand with the salt; the olives will add to the dish's saltiness. Set aside.

2. Line a shallow glass baking dish with fennel fronds. Top with a layer of the lemons and then a layer of fennel slices. Place the fish on top.

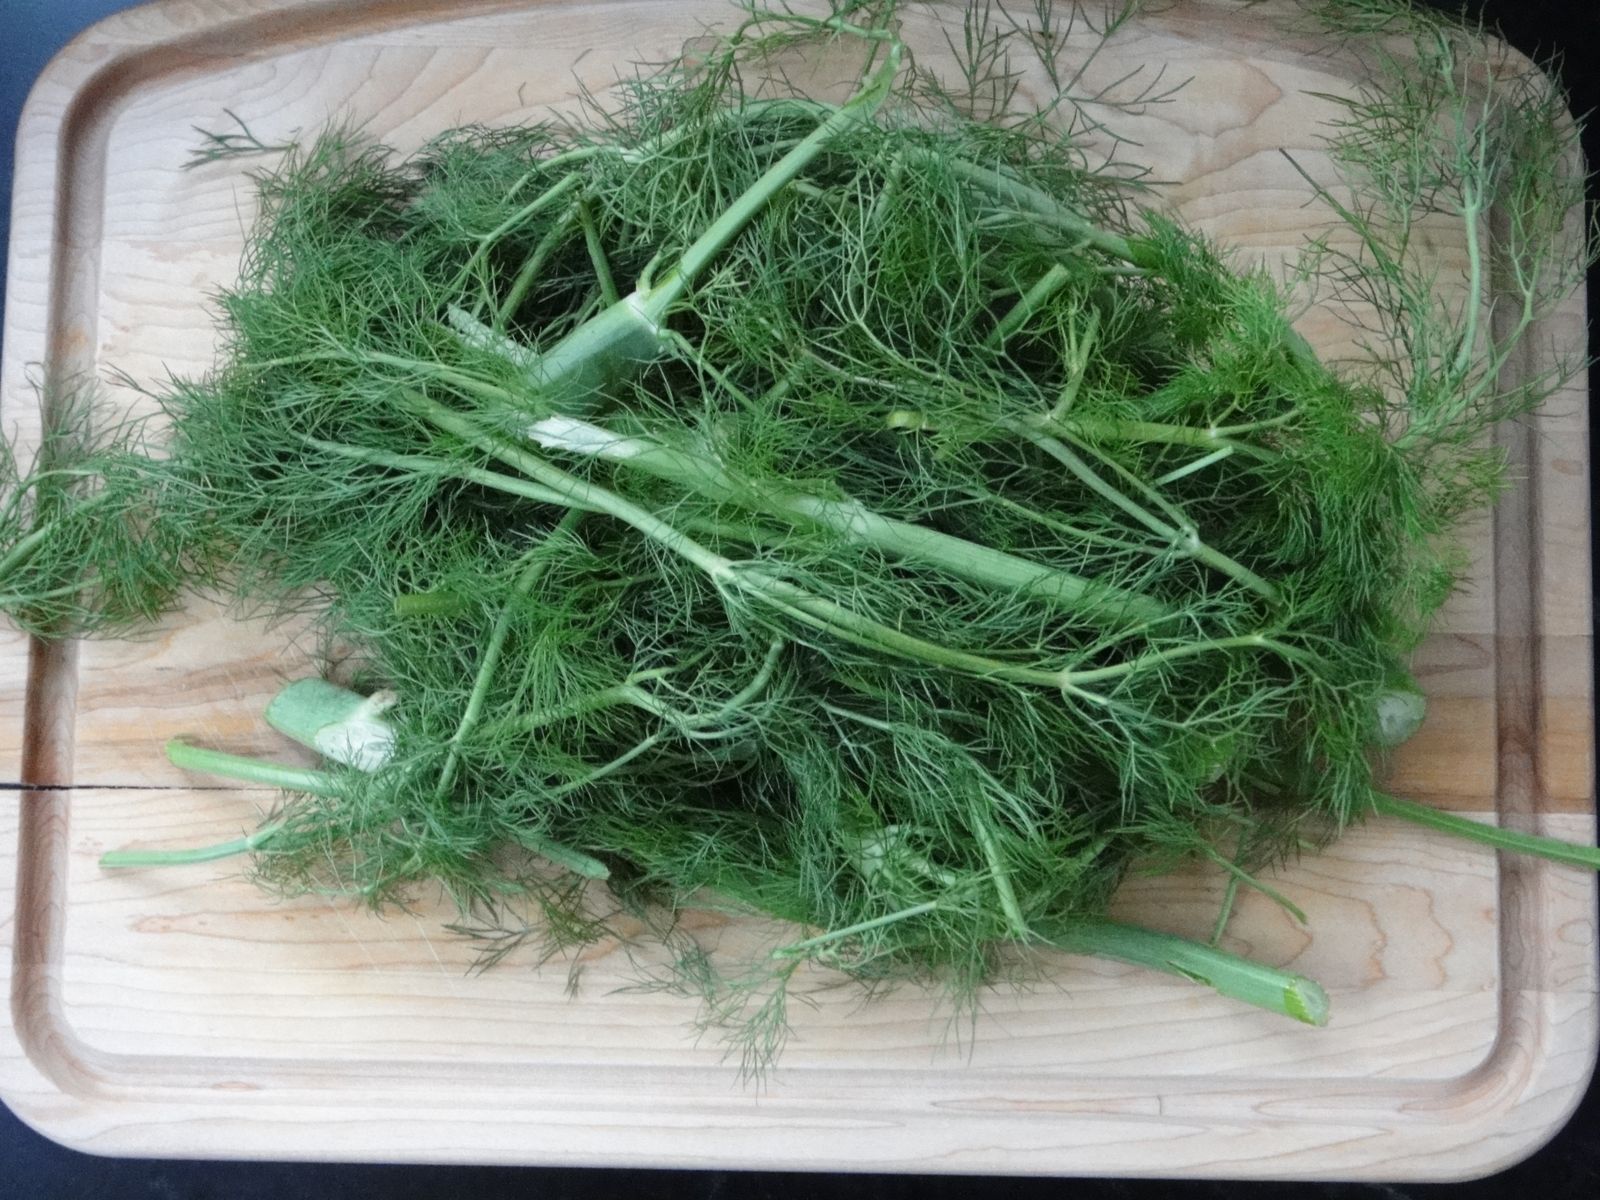
You can't have too many fronds at the bottom of the dish; supplement with the celery-like stalks in a pinch

3. Sprinkle the olives on top and around the fish. Add another layer of lemons and fennel slices. Carefully pour the olive oil into the dish until the fish is almost completely submerged.

Don't worry about the olive brine getting into the dish

Note the the oil is not covering the lemons and fennel, but is covering the fish

4. Bake in the middle rack of the oven for one hour, or until the fish is flaky. To serve, remove the fish from the dish with a slotted spoon and divide amongst two plates. Garnish with the lemon and fennel slices and the olives.  Add a pinch of Maldon salt to finish the dish, if desired.  Just be careful about the overall saltiness of the dish.

5. Pour a glass of Alsatian Pinot Gris, don your most fabulous hat and dream of the Mediterranean while you eat.

*Regarding fennel fronds. I got lucky when I went to Fiesta Farms for the fennel; Serge in produce was just trimming a big crate of fennel for restocking. If you can sweetly wheedle a bag of the discarded frond tops, they make an excellent lining for fish dishes, as I've used them here, or to stuff into whole salmon. If you really want to capitalise on an unexpected bounty of fronds, mince and measure the feathery greens into three tbsp portions and freeze in little baggies to have ready to make Fennel-Olive Oil Quick Bread.